If you’re using Google for your email, whether it’s for personal or professional use, you’ll want to know what an Imap server is and how it can help you.
Imap servers are used by Google to make sure that the emails you send on their system get to the recipient as quickly as possible. It also makes sure that your messages are delivered in the correct order, and that they don’t get lost along the way.
What Is A Imap Server For Gmail
Have you ever thought about reading messages from your Gmail in other applications or mail clients. In fact, there has already been such a feature named IMAP that turns this idea into reality. The following parts of this article are going to tell you what IMAP is and how to enable it on your Gmail and use it in other mail clients.
What is IMAP?
IMAP stands for Internet Message Access Protocol. It is an Internet standard protocol of accessing and storing mails on a mail server. With IMAP, email clients can take email messages from a mail server over a TCP/IP connection. Basically, IMAP allows you to access your email messages via the Internet wherever you are. You can even read your messages on multiple devices, and they are synced in real time, thanks to IMAP.
How to enable Gmail IMAP settings
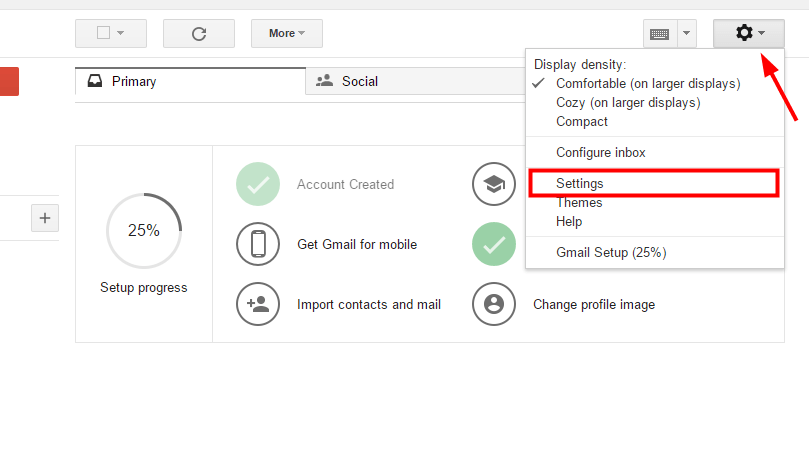
You can set up Gmail IMAP in other email clients. But you need to enable it in your Gmail beforehand. 1) Log into your Gmail with a web browser. 2) Click on the gear icon at the top right of the page. Then select Settings in the drop down menu.
3) In Settings, click Forwarding and POP/IMAP tab and select Enable IMAP (which is under IMAP status In IMAP Access section). After that, click Save Changes.
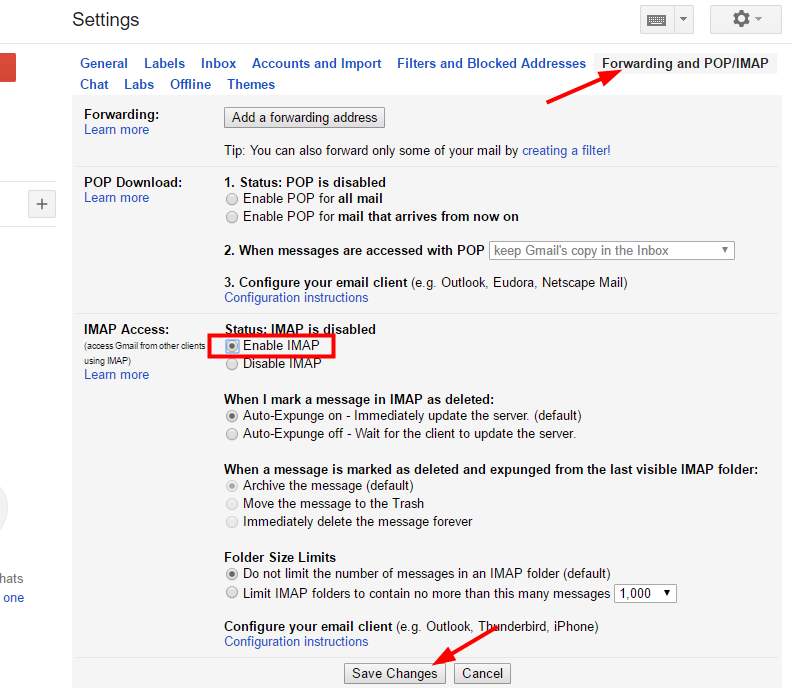
IMAP has now been enabled in your Gmail.
How to read messages from Gmail in other email clients?
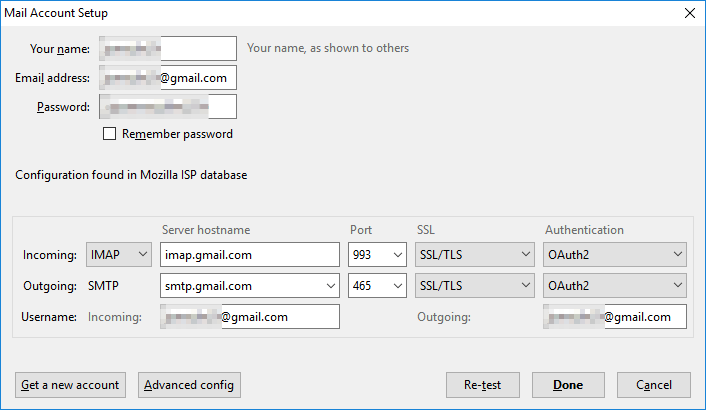
After you have enabled IMAP in Gmail, you can change IMAP settings in your email client. In fact, there are many clients that can auto-configure IMAP for you when you try to build your Gmail account. You don’t have to be concerned too much about the configuration process. But you can still complete the configuration on your own. To do so, you will need the information as follows:
- Incoming Mail (IMAP) Server: imap.gmail.com
- Requires SSL (encryption method): Yes
- Port: 993
- Outgoing Mail (SMTP) Server: smtp.gmail.com
- Requires SSL (encryption method): Yes
- Requires TLS (encryption method): Yes (if available)
- Requires Authentication: Yes
- Port for SSL (encryption method): 465
- Port for TLS/STARTTLS (encryption method): 587
- Name: Your Name
- User name or email address: Your full Gmail address
- Password: Your Gmail password
You will need to use the information above to set up IMAP when you building a new account in your email client. You can check the instruction of your email application and learn how to do so. The basic idea here is, when configuring, fill out the form of settings with the information provided above (servers, ports and encryption methods of incoming mail and outgoing mail).
imap server settings
- To synchronize your emails with IMAP or POP3 you need to activate this feature in your mail.com account. Click Email → Settings → POP3 & IMAP → Enable access to this account via POP3 and IMAP. Confirm the altered settings by clicking Save and start your external email program.
- Click File → Info → Add account.The Outlook wizard for setting up a new account will open.
- Enter an email address to add your account.
- Click Advanced options and check the box for Let me set up my account manually.
- Click Connect.
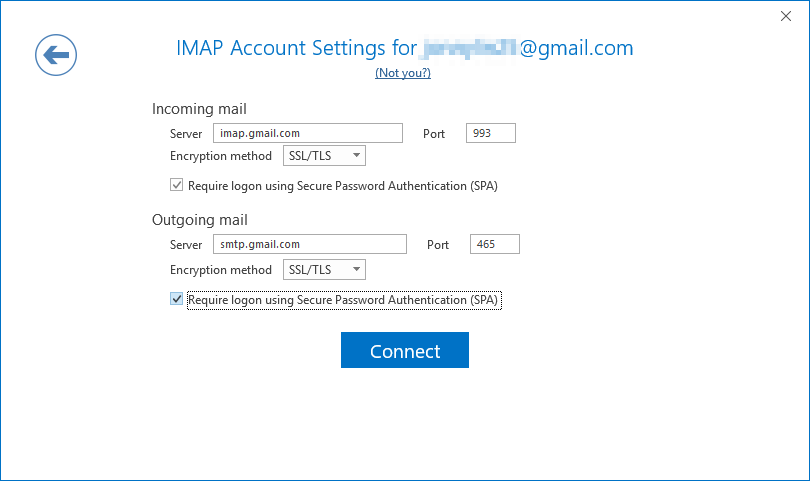
- Choose the account type IMAP.The dialog IMAP Account Settings will open up.
- Use the following settings:
- Incoming mail: Server imap.mail.com with port 993 and check the option This server requires an encrypted conncetion (SSL/TLS)
- Outgoing mail: Server smtp.mail.com with port 587 and the encryption method STARTTLS
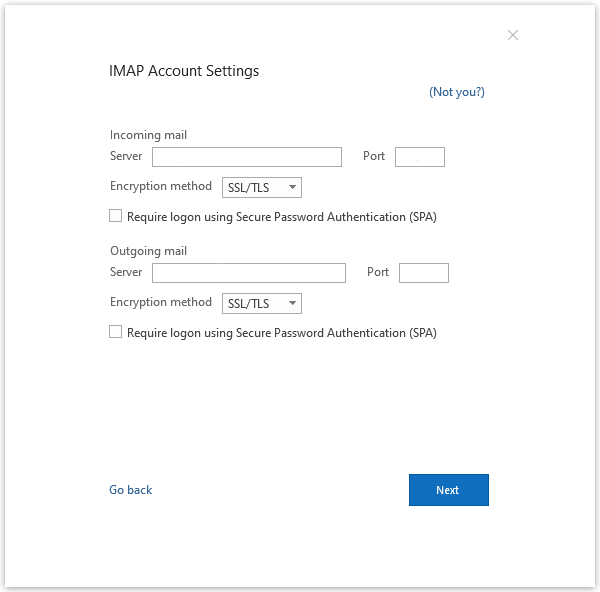
- Click on Next.
- Enter your password and click on Connect.
Your account is set up und ready to use. Click on OK to close the wizard.